How to install Solar Anchoring Kits
Solar Anchoring Kits - How to Install
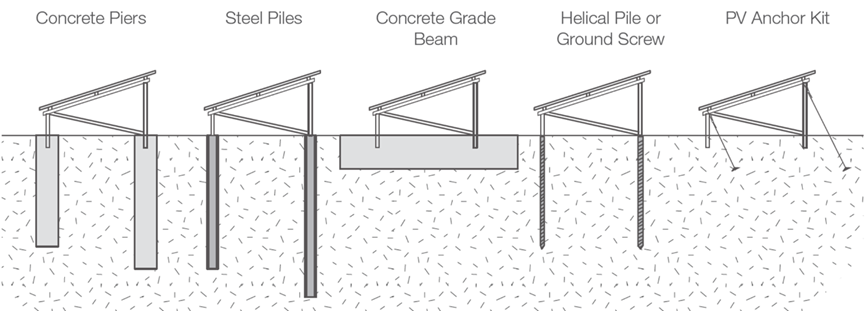
Our Solar Anchoring Kits provide up to 2,750 kg | 6,060 lbs pull out performance by locking into the soil. They have been developed based on our tried and tested technology used in demanding slope stabilisation, civil and seismic applications around the world.
The kits can be installed in just minutes using only hand tools. They are an ideal contingency for contractors where foundation issues arise and can even open up previously unusable land like brown field or landfill to solar development. Their low profile ensures minimal disturbance to the ground around the structure.
Installation Instructions
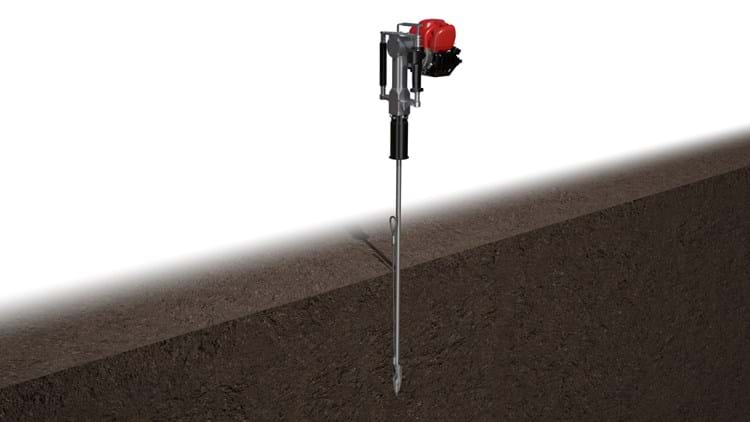
Step 1:
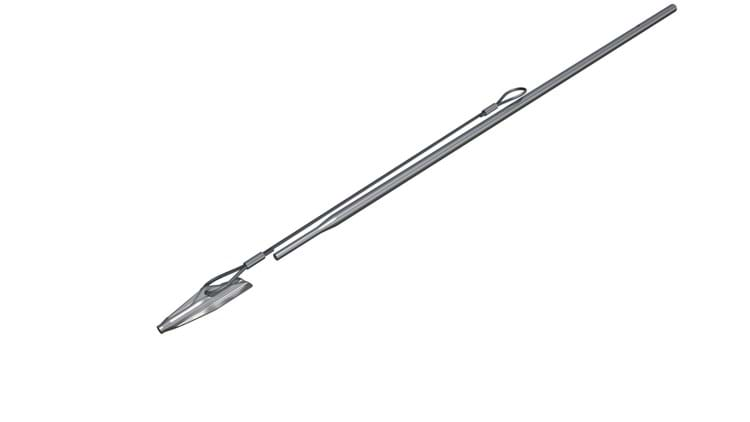
Insert tip of drive rod in to the anchor
Step 2:
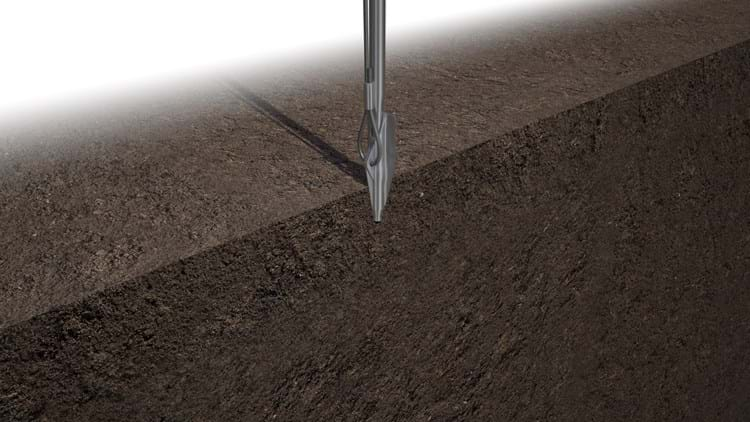
Push the PV Anchor in to the surface of the ground at prescribed location.
Step 3:
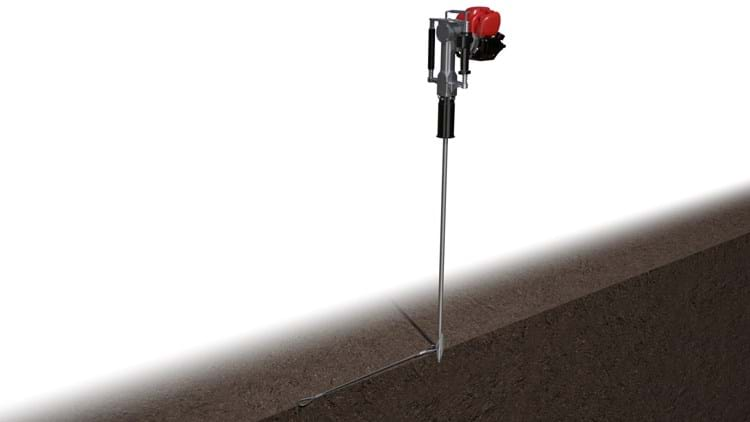
Turn on and position the GPD (or Breaker) onto the other end of the drive tool, set the GPD/Drive Rod at the required angle before driving the PV Anchor into the ground.
Step 4:
Drive the PV Anchor. Once required depth is achieved, remove GPD (or Breaker) from drive rod.
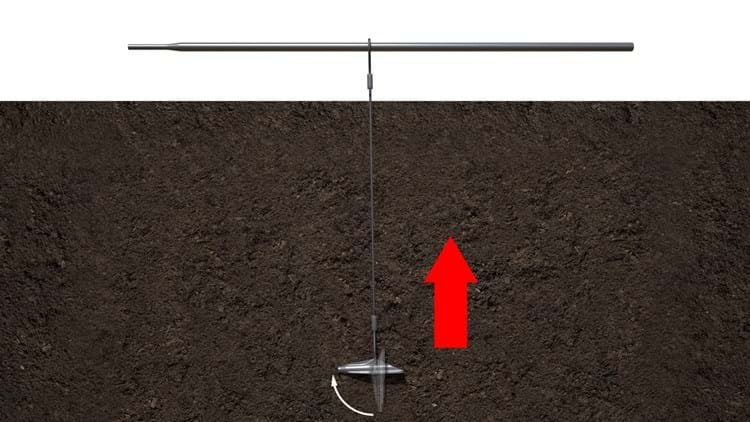
Step 5:
When PV Anchor is at desired depth, use JackJaw to remove drive rod (can also be done by hand in softer ground) before using JackJaw and Anchor set tool to load lock PV Anchor.
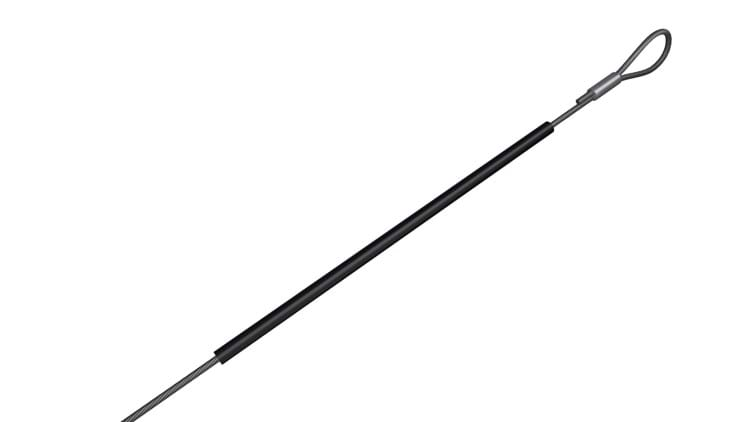
Step 6:
Take the supplied wire sling and add the protective tubing to the loose end of the wire.
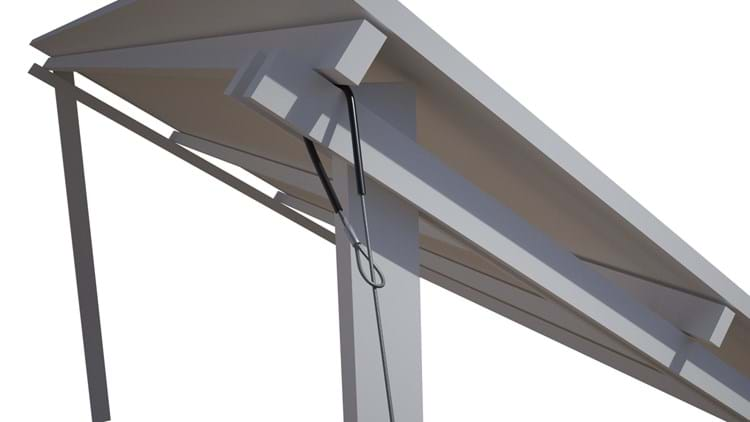
Step 7:
Using the supplied sling connect your fixing point to the frame (using the choke or direct fixing method).
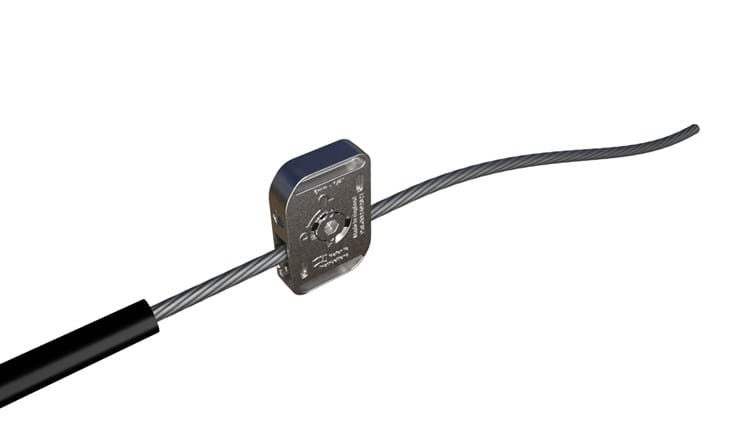
Step 8:
Add the dynamic to the fused end of the sling, roughly 0.5m from the ground. (To make any adjustments, use the supplied flag key).
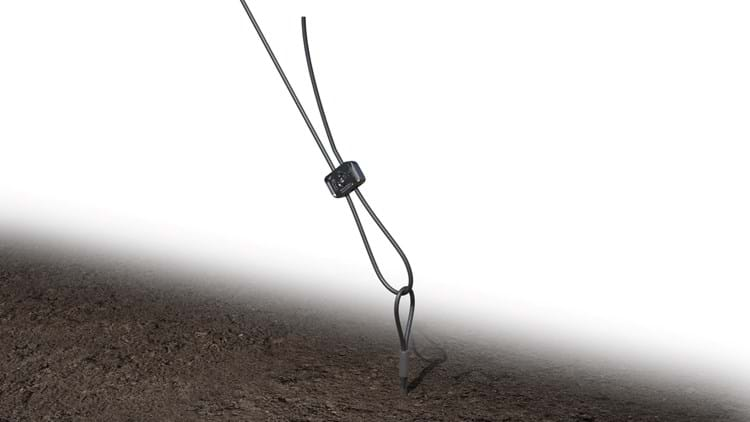
Step 9:
Feed the fused wire through the anchor thimble and back through the dynamic tensioner. Pull hand tight leaving min. 150mm tail wire to remove as much slack as possible.
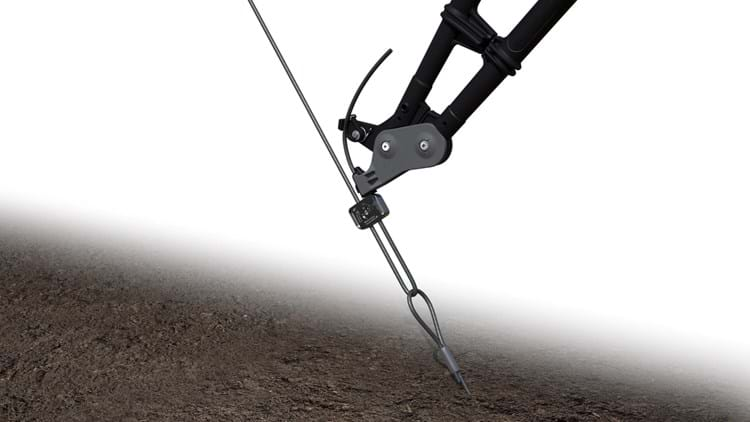
Step 10:
Using the Gripple Torq Tool, apply 100kgf via the tail wire.
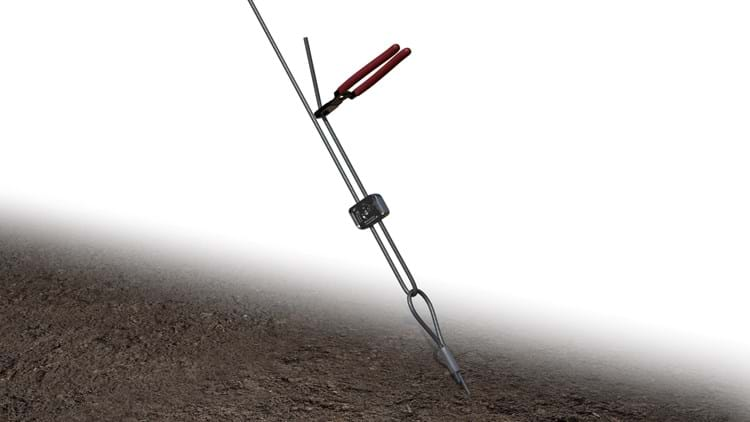
Step 11:
Cut any excess wire.
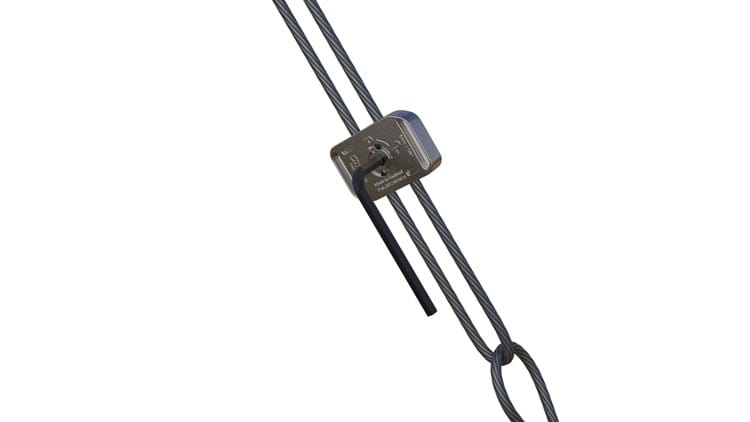
Step 12:
Using the hex key supplied, turn the central lock 90° to complete the installation.
Why use Gripple?
- Significant time and cost savings on your project
- Complete, off-site solutions which minimise health and safety concerns
- Innovative, patented solutions designed by an in-house team of engineers
- Considerable reductions in packaging, vehicle movements & embodied CO2
- A range of support services at every stage of your project, provided by a dedicated technical team
- Aesthetically pleasing solutions; lightweight and virtually invisible